
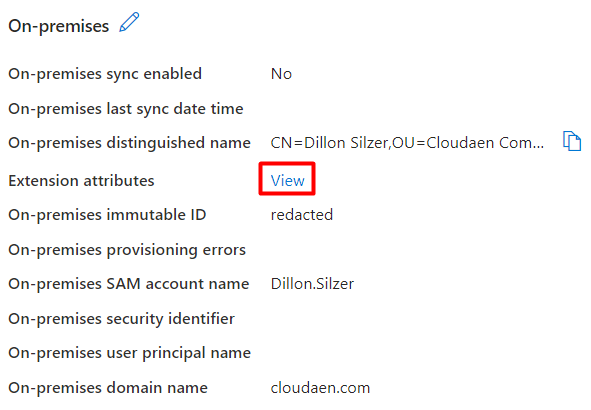
Microsoft 365 - Update Custom Extension Attributes for legacy on-prem hybrid Users with PowerShell
Encountering obstacles when updating Extension attributes for Microsoft 365 users not originally created in the cloud via Graph API PowerShell? The problem lies in Graph API's restriction to only allow updates to Extension attributes for cloud-created users. Even after removing AAD Connect/Entra ID Connect, if users were initially synced using these services, Graph API won't facilitate updates to these attributes.
To work around this hurdle, leverage ExchangeOnlineManagement PowerShell for attribute updates. Changes made through ExchangeOnlineManagement PowerShell flow into AAD/Entra ID, enabling updates to Extension attributes in Entra ID.
Problem
How can one update/automate On-premises Extension attributes using PowerShell with an unattended script?
Solution
1. Begin by creating a self-signed certificate on your server with PowerShell:
<#
.SYNOPSIS
Creates a Self Signed Certificate for use in server to server authentication

.DESCRIPTION

.EXAMPLE
PS C:\> .\Create-SelfSignedCertificate.ps1 -CommonName "MyCert" -StartDate 2015-11-21 -EndDate 2017-11-21

This will create a new self signed certificate with the common name "CN=MyCert". During creation you will be asked to provide a password to protect the private key.

.EXAMPLE
PS C:\> .\Create-SelfSignedCertificate.ps1 -CommonName "MyCert" -StartDate 2015-11-21 -EndDate 2017-11-21 -Password (ConvertTo-SecureString -String "MyPassword" -AsPlainText -Force)

This will create a new self signed certificate with the common name "CN=MyCert". The password as specified in the Password parameter will be used to protect the private key

.EXAMPLE
PS C:\> .\Create-SelfSignedCertificate.ps1 -CommonName "MyCert" -StartDate 2015-11-21 -EndDate 2017-11-21 -Force

This will create a new self signed certificate with the common name "CN=MyCert". During creation you will be asked to provide a password to protect the private key. If there is already a certificate with the common name you specified, it will be removed first.

#>
Param(

   [Parameter(Mandatory=$true)]
   [string]$CommonName,

   [Parameter(Mandatory=$true)]
   [DateTime]$StartDate,

   [Parameter(Mandatory=$true)]
   [DateTime]$EndDate,

   [Parameter(Mandatory=$false, HelpMessage="Will overwrite existing certificates")]
   [Switch]$Force,

   [Parameter(Mandatory=$false)]
   [SecureString]$Password
)

# DO NOT MODIFY BELOW

function CreateSelfSignedCertificate(){

    #Remove and existing certificates with the same common name from personal and root stores
    #Need to be very wary of this as could break something
    if($CommonName.ToLower().StartsWith("cn="))
    {
        # Remove CN from common name
        $CommonName = $CommonName.Substring(3)
    }
    $certs = Get-ChildItem -Path Cert:\LocalMachine\my | Where-Object{$_.Subject -eq "CN=$CommonName"}
    if($certs -ne $null -and $certs.Length -gt 0)
    {
        if($Force)
        {

            foreach($c in $certs)
            {
                remove-item $c.PSPath
            }
        } else {
            Write-Host -ForegroundColor Red "One or more certificates with the same common name (CN=$CommonName) are already located in the local certificate store. Use -Force to remove them";
            return $false
        }
    }

    $name = new-object -com "X509Enrollment.CX500DistinguishedName.1"
    $name.Encode("CN=$CommonName", 0)

    $key = new-object -com "X509Enrollment.CX509PrivateKey.1"
    $key.ProviderName = "Microsoft RSA SChannel Cryptographic Provider"
    $key.KeySpec = 1
    $key.Length = 2048
    $key.SecurityDescriptor = "D:PAI(A;;0xd01f01ff;;;SY)(A;;0xd01f01ff;;;BA)(A;;0x80120089;;;NS)"
    $key.MachineContext = 1
    $key.ExportPolicy = 1 # This is required to allow the private key to be exported
    $key.Create()

    $serverauthoid = new-object -com "X509Enrollment.CObjectId.1"
    $serverauthoid.InitializeFromValue("1.3.6.1.5.5.7.3.1") # Server Authentication
    $ekuoids = new-object -com "X509Enrollment.CObjectIds.1"
    $ekuoids.add($serverauthoid)
    $ekuext = new-object -com "X509Enrollment.CX509ExtensionEnhancedKeyUsage.1"
    $ekuext.InitializeEncode($ekuoids)

    $cert = new-object -com "X509Enrollment.CX509CertificateRequestCertificate.1"
    $cert.InitializeFromPrivateKey(2, $key, "")
    $cert.Subject = $name
    $cert.Issuer = $cert.Subject
    $cert.NotBefore = $StartDate
    $cert.NotAfter = $EndDate
    $cert.X509Extensions.Add($ekuext)
    $cert.Encode()

    $enrollment = new-object -com "X509Enrollment.CX509Enrollment.1"
    $enrollment.InitializeFromRequest($cert)
    $certdata = $enrollment.CreateRequest(0)
    $enrollment.InstallResponse(2, $certdata, 0, "")
    return $true
}

function ExportPFXFile()
{
    if($CommonName.ToLower().StartsWith("cn="))
    {
        # Remove CN from common name
        $CommonName = $CommonName.Substring(3)
    }
    if($Password -eq $null)
    {
        $Password = Read-Host -Prompt "Enter Password to protect private key" -AsSecureString
    }
    $cert = Get-ChildItem -Path Cert:\LocalMachine\my | where-object{$_.Subject -eq "CN=$CommonName"}

    Export-PfxCertificate -Cert $cert -Password $Password -FilePath "$($CommonName).pfx"
    Export-Certificate -Cert $cert -Type CERT -FilePath "$CommonName.cer"
}

function RemoveCertsFromStore()
{
    # Once the certificates have been been exported we can safely remove them from the store
    if($CommonName.ToLower().StartsWith("cn="))
    {
        # Remove CN from common name
        $CommonName = $CommonName.Substring(3)
    }
    $certs = Get-ChildItem -Path Cert:\LocalMachine\my | Where-Object{$_.Subject -eq "CN=$CommonName"}
    foreach($c in $certs)
    {
        remove-item $c.PSPath
    }
}

if(CreateSelfSignedCertificate)
{
    ExportPFXFile
    RemoveCertsFromStore
}
Open PowerShell
2. Once the script above is on your server, open PowerShell and navigate to the directory of your script and run:
.\Create-SelfSignedCertificate.ps1 -CommonName "MSExchangeOnline" -StartDate 2024-04-17 -EndDate 2026-04-17IMPORTANT: You will be prompted to enter a password. Ensure you remember this password.
Open Directory of Script
3. Use Create-SelfSignedCertificate.ps1 to generate a SHA1 cert for ExchangeOnline. This generates two files, a cer and a pfx in the directory of the script.
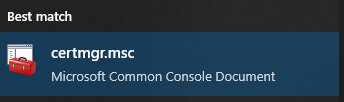
Open MMC
4. Next, import the certificate into the certificate store. Open MMC (go to Start Menu > type certmgr.msc), add Certificates as the current user. Navigate to Personal -> Certificates, then right-click and choose import. Locate the pfx file and import it, providing the assigned password when prompted.
5. Afterward, retrieve the thumbprint for use in the script. You can do this by clicking the Certificate > go to Details tab > scroll down to Thumbprint and copy the value.
App Registration
6. Go to AAD/Entra ID > App registrations.
7. Click + New registration > enter a Name > choose "who can use this application or access this API?" as Accounts in this organizaitonal directory only > click Register.
Add Certificate from server to App registration
8. Download the .cer to your device to upload to Entra ID.
9. Open your newly created App registration > go to Certificates & secrets > Certificates tab > click Upload certificate > upload the .cer file > provide a description (something meaningful for your future reference).
Grant API Permissions
10. In the App registration > go to API permissions > go to + Add a permission > go to APIs my organizaiton uses > search "Office 365" > choose Office 365 Exchange Online.
11. Choose Application permissions > under "Exchange" choose Exchange.ManageAsApp > under "MailboxSettings" choose MailboxSettings.ReadWrite > click Add permissions.
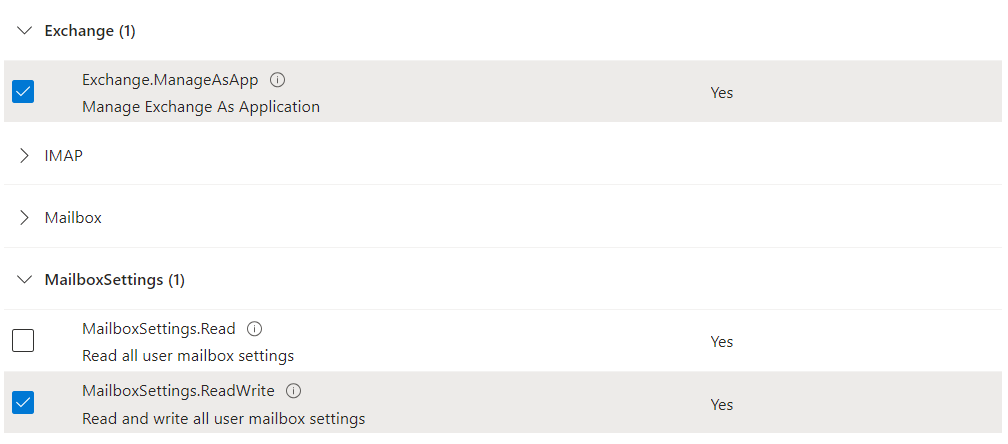
12. When the window closes, click Grant admin consent for Your Company Name.
App roles
13. Navigate to AAD/Entra ID > go to Roles and administrators > find Exchange Administrator.
14. Click + Add assignments > add your App registration (Service Principal) name as a member to Exchange Administrator role to the tenant.
Running script unattended
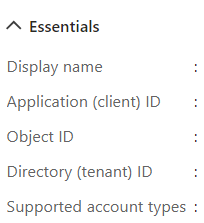
15. You may now run your script unattended by running the following PowerShell line: (you will need the Application (client) ID from your App registration overview as seen below)
16. Create a PowerShell script (ensure you have the module ExchangeOnlineManagement installed)
$CertificateThumbprint = "CertificateThumbprint"
$AppId = "ApplicationID"
$Organization = "yourdomain.onmicrosoft.com"
Connect-ExchangeOnline -CertificateThumbprint $CertificateThumbprint -AppId $AppId -Organization $Organization
Fill out Custom Extension Attributes
17. You can now run the following script to fill out the information for your users: (you will need to either get all users and iterate through them or test with a user's Object ID which can be found in Entra ID user's Overview.
Set-Mailbox -Identity "User-Object-ID" -CustomAttribute1 "Test"This should now update the Custom Extension Attribute for the previously (or currently) hybrid user.
Summary
Microsoft Graph API imposes limitations on updating Custom Extension Attributes for on-premises hybrid users, whether they're currently joined or were previously joined. Specifically, Graph API permits updates only for attributes created in the cloud. This article provides a workaround, enabling you to utilize these attributes within Microsoft 365 dynamic membership groups as a qualifier.
Additional Content
You may now automate the the Custom Extension Attributes in your Microsoft 365 groups (Dynamic membership rules) as seen below:
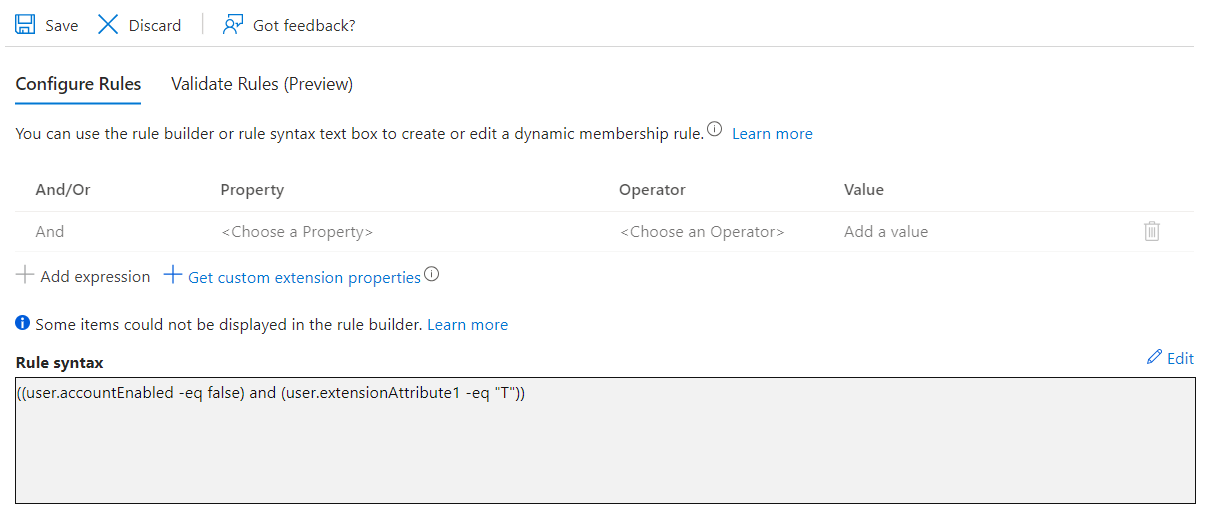
This rule verifies if the account is disabled and if the user's 'extensionAttribute1' is set to 'T' indicating termination. This verification serves a practical purpose due to limitations with dynamic membership groups. For instance, although we initially intended to utilize 'Employee Type' for grouping, its unavailability as a parameter in dynamic membership groups required the use of Extension attributes.